Getting Started
This documentation will guide you through your first steps to running containers on VERNE. This is intended for SDSU instructors and researchers who are interested in taking advantage of High-Performance Computing (HPC) resources for Data Science and Machine Learning workloads.
Learning Outcomes
After reading and following this documentation you should be able to:
- Understand containers and Kubernetes at a high-level (5 mins)
- Start a Jupyter Notebook with the Kube Notebook image (5 mins)
- Configure your Kube Notebook to be able to interact with VERNE (5 mins)
- Launch a container on VERNE (15 mins)
Prerequisites
This documentation assumes that you have:
- Followed the Getting Access documentation
- Some familiarity with the Linux terminal
Containers and Kubernetes
At a high-level, containers are packaged software applications containing all of their dependencies like the operating system (OS), file structures, configuration and other code libraries.
Containers offer many benefits but here we list a few of the most impactful ones:
- Isolated Runtime Environments
- Two or more containers running on the same system do not affect one another.
- Portability
- The same container can be run on a laptop, on the cloud, or on VERNE without being modified.
- Consistency
- The same container given the same input will produce the same output.
Kubernetes, often shortened to ‘k8s’, is a container orchestration platform for “automating deployment, scaling and management of containerized applications.” If you are familiar with more traditional HPC systems, you can think of Kubernetes like a workload manager (i.e. Slurm). Similar to workload managers, Kubernetes allows us to make requests for resources like CPUs, GPUs and memory to run our programs. Kubernetes wraps a container in a pod, the smallest Kubernetes compute unit, which is then scheduled and run on the cluster. It is important to note that pods are ephemeral and once a pod is deleted everything inside the pod is deleted – meaning any data downloaded, content generated or files modified. Make sure to transfer data that you want to save out of the pod before deleting it.
Starting a Kube Notebook
Research and Cyberinfrastructure has created a Kube Notebook image to simplify access to Kubernetes. This container image will launch a Jupyter Lab instance that you can access from your web browser. From inside Jupyter Lab you can launch a terminal with the kubectl software pre-installed. Kubectl is a commandline tool for communicating and interacting with the Kubernetes cluster.
Follow these instructions to spin up and connect to your Kube Notebook:
- Sign into jupyterhub.sdsu.edu
- Here is a video for signing into VERNE JupyterHub
- Complete the Server Options form with the following settings:
- GPUs = 0
- CPU Cores = 2
- Memory GB = 4
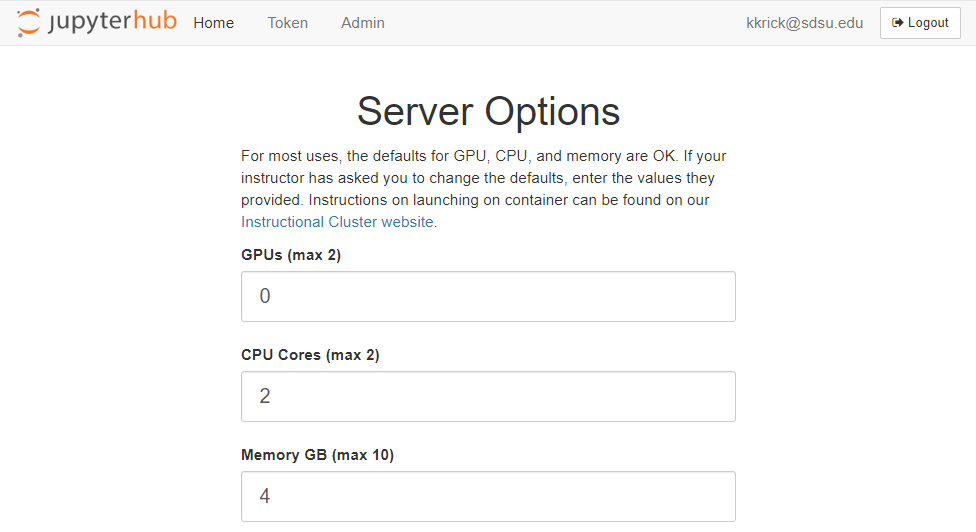
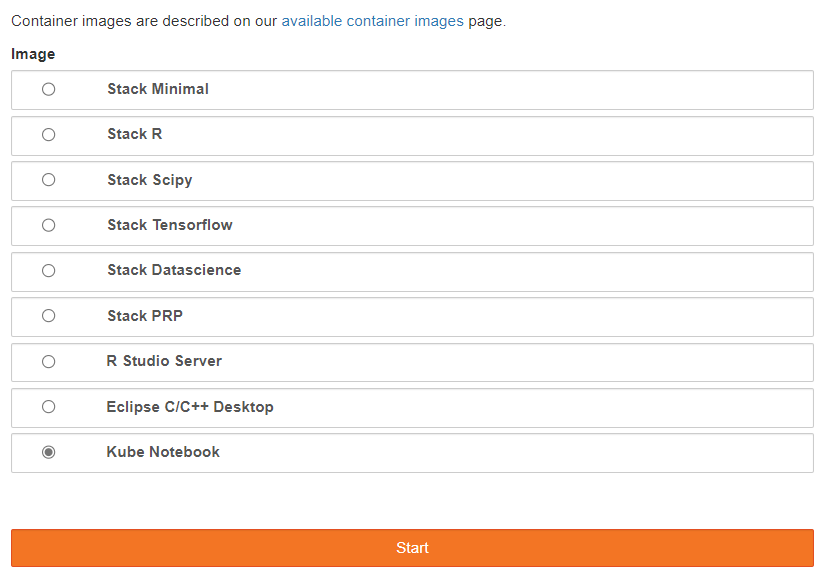
- Select the “Kube Notebook” image
- Click Start
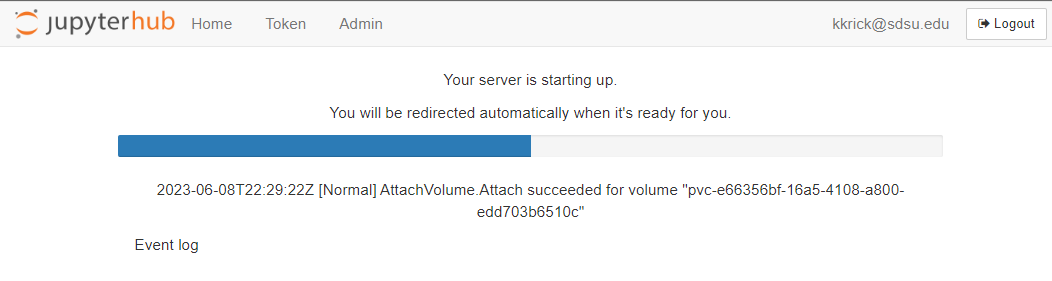
- You will see a progress bar while your notebook is starting
- Once the notebook has loaded, you should see the Jupyter Lab UI
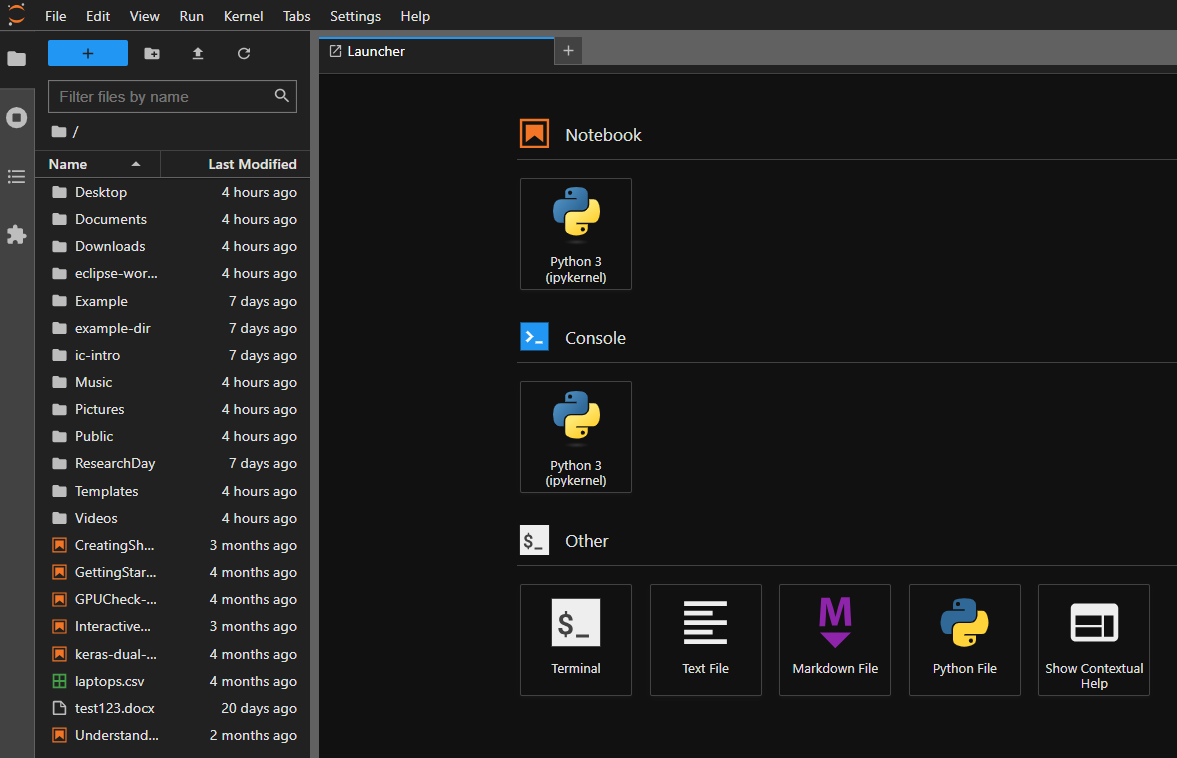
You now have a notebook running that has the kubectl command pre-installed which will allow you to interact with the Kubernetes cluster.
Configuring the Kube Notebook
With the Kube Notebook running, let’s configure it to talk to the National Research Platform Kubernetes cluster. You will need the kube config from step 2 of the NRP tasks from the Getting Access guide.
Follow these steps to configure the notebook:
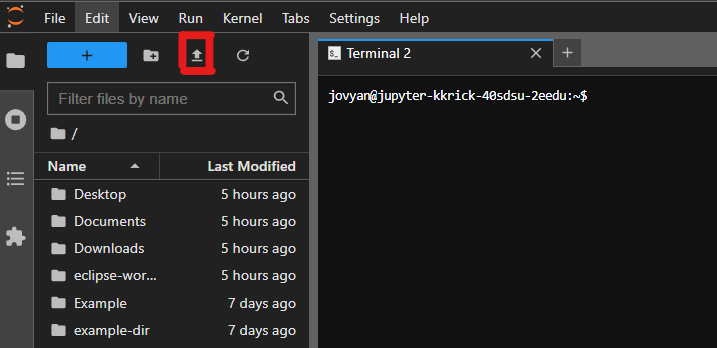
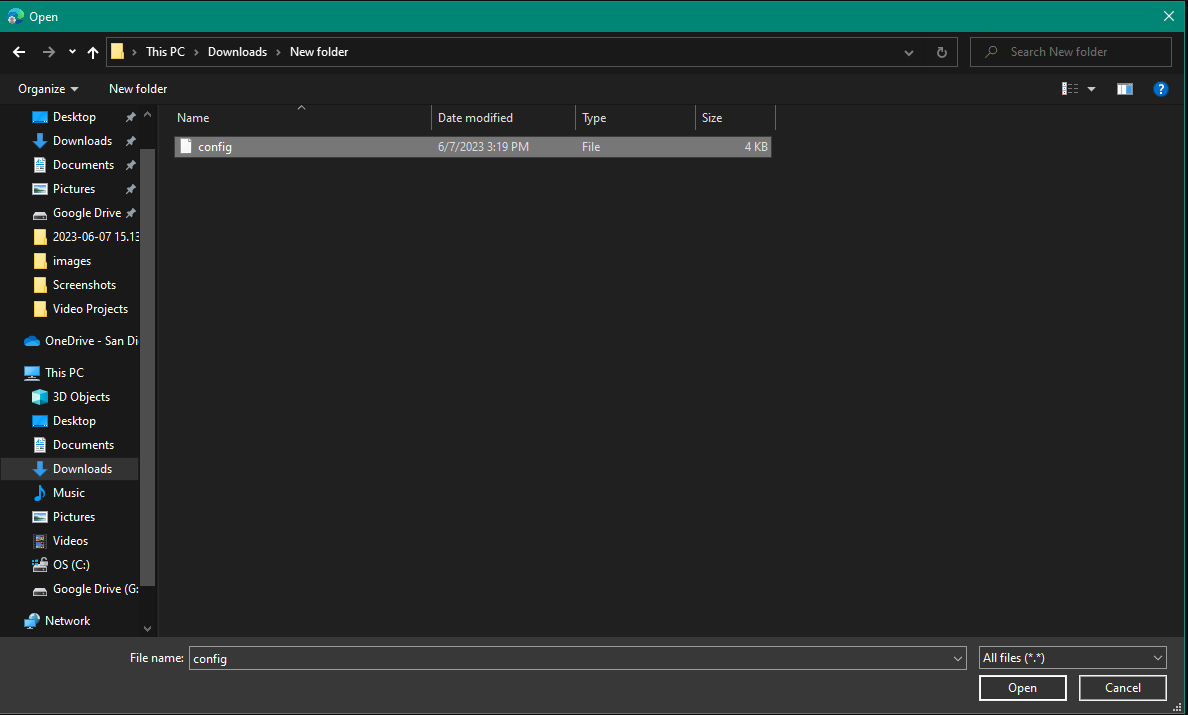
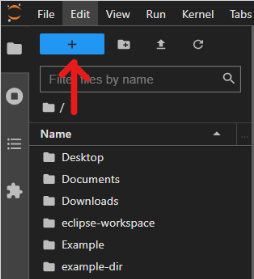
- Upload your config file by clicking the upload files icon and then selecting your config:
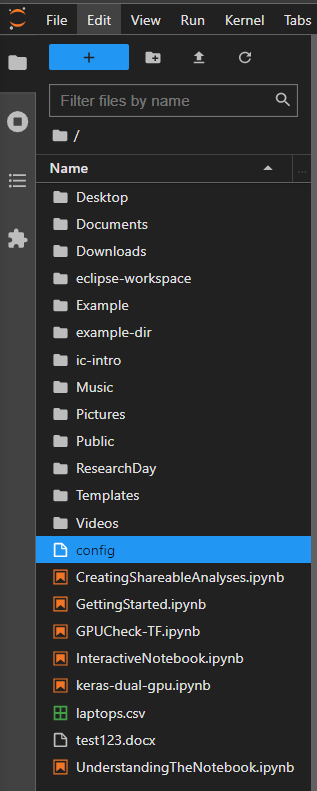
- Verify that your config file has been uploaded in the file browser of Jupyter Lab
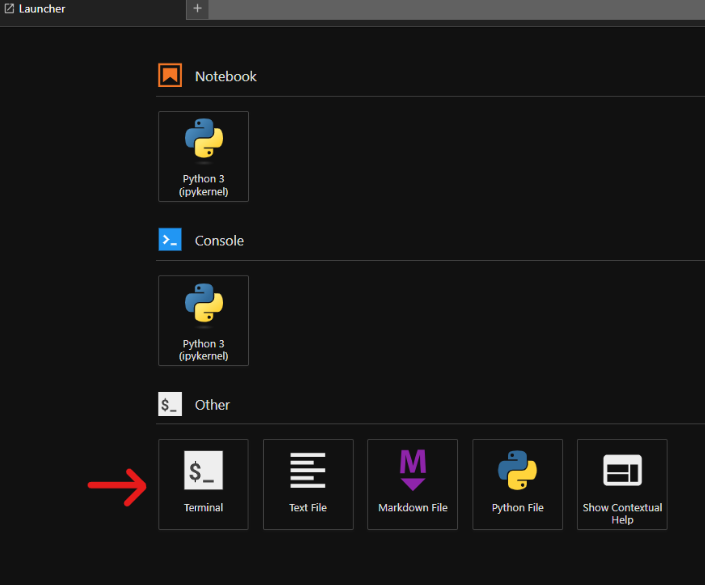
- Click the “+” button
- Open the Terminal
- Run the following commands:
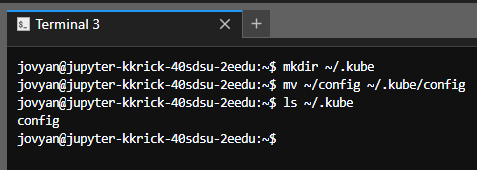
- Make the .kube folder:
mkdir ~/.kube
- Move your config file into the .kube folder:
mv ~/config ~/.kube/config
- Check to make sure your config file copied successfully:
ls ~/.kube
- You should see the config file listed:
- Make the .kube folder:
- Verify that your notebook can communicate with the cluster with this command (replace the namespace and remove the brackets):
kubectl get pods -n [your-namespace]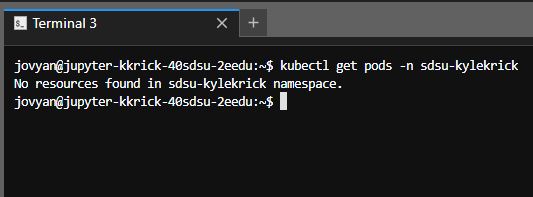
- Note: output may vary
Congratulations! Your Kube Notebook is now configured to talk to the National Research Platform’s Kubernetes cluster.
Launching Containers on VERNE
Now that your notebook is configured, let’s run your first container on VERNE. For the following example, we will be using the simple Hello SDSU repository and its associated container image.
Checking Out the Example Repository
Follow these steps to get a copy of the repo cloned to your kube notebook and then examine the files to get familiar with them.
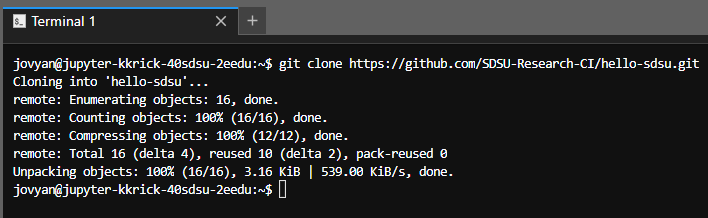
- From your kube notebook pull up a terminal window and run this command to get a copy of the repository:
git clone https://github.com/SDSU-Research-CI/hello-sdsu.git
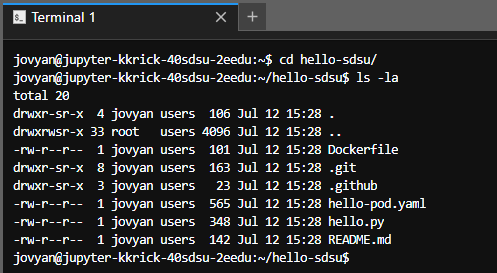
- Change directory into the hello-sdsu directory and then list the files:
cd hello-sdsuls -la
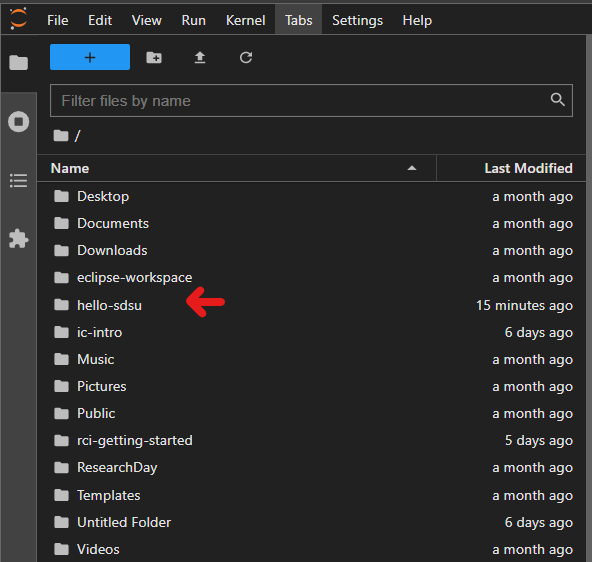
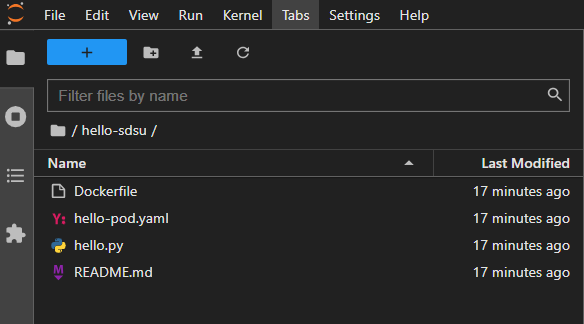
- Notice that the Jupyter Lab file explorer is still viewing the previous directory. Double click the hello-sdsu directory in the file explorer to open it
- Open the
hello.pyprogram; you should see the following:sdsu = """ _______ _______ _______ __ __ ( ____) | __ \ ( ____) | | | | \ \ | | \ \ \ \ | | | | \ \ | | | ) \ \ | | | | ___\ \ | |__/ / ___\ \ | |___| | (_______) |_______/ (_______) \_________/ """ print(f"Hello there,\n{sdsu}")- This program is a simple variation on the typical Hello, World program with a bit of ascii art
- Open the
Dockerfile; you should see the following:FROM python:3 WORKDIR /usr/src/app COPY hello.py /usr/src/app/hello.py CMD ["python3", "hello.py"]- This is a Dockerfile which defines a container image
- This container image is based on the Python 3 image and it copies our
hello.pyprogram into the container and then runs it
-
Open the Kubernetes manifest file
hello-pod.yaml; you should see the following:apiVersion: v1 kind: Pod metadata: name: hello-pod spec: containers: - name: hellopod image: ghcr.io/sdsu-research-ci/hello-sdsu:main resources: # NOTE: CPU/RAM limit may not exceed 1.2x (20%) of request size limits: memory: 100Mi cpu: 100m requests: memory: 100Mi cpu: 100m command: ["sh", "-c", "sleep infinity"] affinity: nodeAffinity: requiredDuringSchedulingIgnoredDuringExecution: nodeSelectorTerms: - matchExpressions: - 'key': 'nautilus.io/sdsuinstruction' 'operator': 'In' 'values': ["true"] tolerations: - effect: NoSchedule key: nautilus.io/sdsu-fix operator: Exists- Kubernetes manifests are defined in the YAML file format
- At first glance there is a lot going on in this file, but for now we will focus on these three things:
kind: Pod- This specifies the kind of Kubernetes object, in this case a pod but we could also specify other Workload Resources like jobs or deployments
image: ghcr.io/sdsu-research-ci/hello-sdsu:main- This is the container image which the container will be based on
command: ["sh", "-c", "sleep infinity"]- This is the linux command, passed in as a string array, to be executed once the container is running inside the pod
- Typically a pod will be deleted after its command(s) have finished executing, but in this case we have a never-ending command so that we have time to log into and examine the pod as it is running
Now that we have explored the files, let’s talk about how this all comes together. First, we have the simple Python program hello.py, which we could execute on any machine with Python 3 installed. Then we take that Python program and put it into a container image with the Dockerfile, which is based on the Python 3 image and thus has Python 3 pre-installed. At this point we can build the container image, or in this example use the pre-built image, and run a container on a container runtime like Docker. Lastly we wrap this container in a Kubernetes pod in the hello-pod.yaml. At this point, we have everything we need in order to schedule this pod to the Kubernetes cluster.
Scheduling the Pod
Now that we have the files cloned and an understanding of what they do, let’s schedule the pod on the Kubernetes cluster. Run the following commands in the terminal of your Kube Notebook:
- First, define an environment variable for your namespace:
ns=[namespace]- Note: Replace the namespace with yours and remove the brackets
- Tell Kubernetes to schedule and run your pod definition:
kubectl apply -f hello-pod.yaml -n $ns- You should see ouput similar to this
pod/hello-pod created
- Check to see if your pod has been scheduled:
kubectl get pods -n $ns --watch- You may see output like this:
NAME READY STATUS RESTARTS AGE hello-pod 0/1 Pending 0 12s hello-pod 1/1 Running 0 32s - Your pod is running once you see the READY column showing 1/1
- Hit
ctrl+cto stop watching the pods
At this point the pod is running our container and is executing the command specified in the pod YAML file: sleep infinity.
Accessing the Pod
Now that the pod is running, let’s get a bash shell on the container running in the pod:
- Tell Kuberenetes to launch an interactive shell session using the bash shell
kubectl exec -it hello-pod -n $ns -- /bin/bash- You should see output similar to the following:
root@hello-pod:/usr/src/app#
- Print the working directory
pwd- You should see the following:
/usr/src/app - The reason we are at this directory is because the container image’s Dockerfile specified the working directory with this line
WORKDIR /usr/src/app
- List the files in the working directory:
ls -la- You should see the following:
 total 4
 drwxr-xr-x 1 root root  22 Jul 11 19:45 .
 drwxr-xr-x 1 root root  17 Jul 11 19:45 ..
 -rw-r--r-- 1 root root 348 Jul 11 19:45 hello.py
- Now let’s execute our Python program:
python hello.py- You should see the following:
Hello there, _______ _______ _______ __ __ ( ____) | __ \ ( ____) | | | | \ \ | | \ \ \ \ | | | | \ \ | | | ) \ \ | | | | ___\ \ | |__/ / ___\ \ | |___| | (_______) |_______/ (_______) \_________/ - Let’s run the Python program again, but direct the output to a file:
python hello.py > hello.txt
- Verify the file was created:
ls -la- You should see the file hello.txt:
 total 8
 drwxr-xr-x 1 root root  23 Jul 13 18:22 .
 drwxr-xr-x 1 root root  17 Jul 11 19:45 ..
 -rw-r--r-- 1 root root 348 Jul 11 19:45 hello.py
 -rw-r--r-- 1 root root 317 Jul 13 18:22 hello.txt
- Exit the bash shell from the container:
exit
At this point we have run our Python program and created an output file in the container running in our pod on the Kubernetes cluster.
Deleting the Pod
Now that we have run our program and generated some output, let’s get our data and then delete the pod.
Follow these steps using the terminal in your Kube Notebook:
- Copy the data from the container’s working directory to your Kube Notebook:
kubectl -n $ns cp hello-pod:/usr/src/app/hello.txt ./hello.txt- Note: The kubectl cp command is intended for small file transfers
- Check your local directory for the hello.txt file:
ls- You should see the file listed:
Dockerfile README.md hello-pod.yaml hello.py hello.txt
- Now, tell Kubernetes to delete the pod:
kubectl -n $ns delete -f hello-pod.yaml- You should see the following:
pod "hello-pod" deleted
- Check to make sure the pod was deleted:
kubectl -n $ns get pods- You should see something similar to the following:
No resources found in sdsu-kylekrick namespace.
Now, as you might recall, we said that pods are ephemeral and everything in them get deleted once the pod is deleted. Just to illustrate that point, let’s schedule the pod again and attach a bash shell to it.
kubectl -n $ns apply -f hello-pod.yamlkubectl -n $ns exec -it hello-pod -- /bin/bash- Now, check for the hello.txt file:
ls -latotal 4 drwxr-xr-x 1 root root 22 Jul 11 19:45 . drwxr-xr-x 1 root root 17 Jul 11 19:45 .. -rw-r--r-- 1 root root 348 Jul 11 19:45 hello.py- Note that only the
hello.pyprogram is listed and that ourhello.txtfile is gone. Thehello.pyprogram is there because the container copies the program each time it is launched, as we specified in the Dockerfile.
- Exit the container
exit
- Tell Kubernetes to delete the pod:
kubectl -n $ns delete -f hello-pod.yaml
Congratulations! You’ve run your first pod on VERNE, run a program within the container and you’ve gotten some data back out. With that, you have the basics to be able to run containers on VERNE.
Next Steps
Check back here soon for further examples and templates from Research and Cyberinfrastructure.
Until then, you can also check out the National Research Platform’s documentation which has some good examples.