{: .note } Cluster storage is replicated but not backed up. Please use the instructions below to ensure you have a copy of any important files downloaded to your comptuer.
Disk Space Management
Each user is granted 80 GB (gigabyte) of storage space accessible in JupyterHub. This space is shared by all container images you launch, and across each course you may be using JupyterHub. You can check your disk usage to get an idea of how much free space you have available.
All files will be removed at the end of the following semester after your last active course. For access not associated with a course, the files will be removed when your SDSUid is deprovisioned.
Upload/Download Files
The JupyterHub File Manager can be used to mange files and folders. This includes uploading, downloading, renaming, and deleting files. You can also create and delete directories and move files between directories. If you are comfortable with the Terminal (command line) you can also use it to manage your files. You will find your files in the /home/jovyan directory. This is considered your home directory.
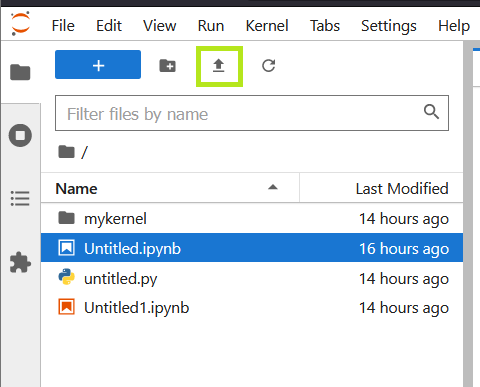
Upload Files
Use the Upload File button on the toolbar of the File Manager to select a single or multiple files to be uploaded.
You can also drag-and-drop from your computer to the File Manager.
Download Files
From the File Manager, right click a file, or files, and select Download. The files will be downloaded to your computer.
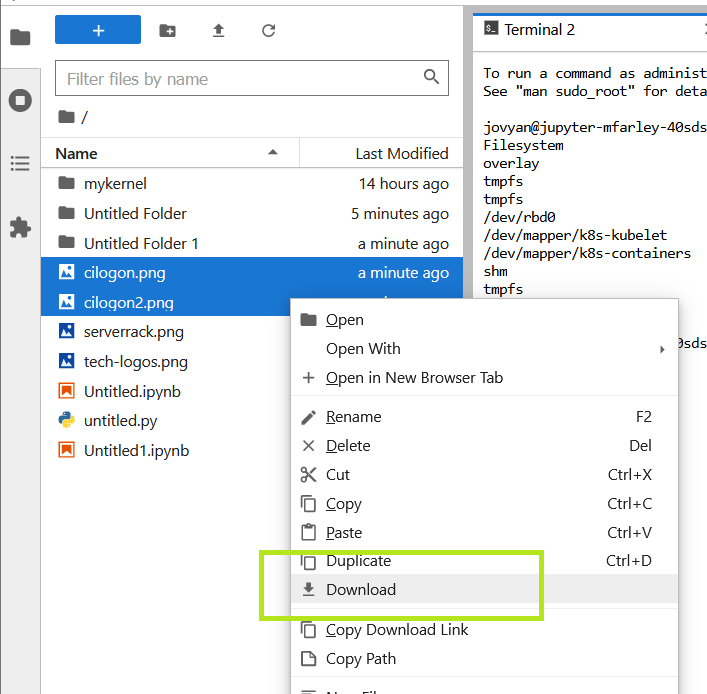
You can not download directories. If you wish to download a directory, consider creating a zip archive.
Back Up to a Zip Archive
Advanced
If you have a need to backup all the files in your home directory, then you can use the zip command to create a zip archive which can be downloaded.
This requires sufficient space as the zip archive will be counted as part of your quota.
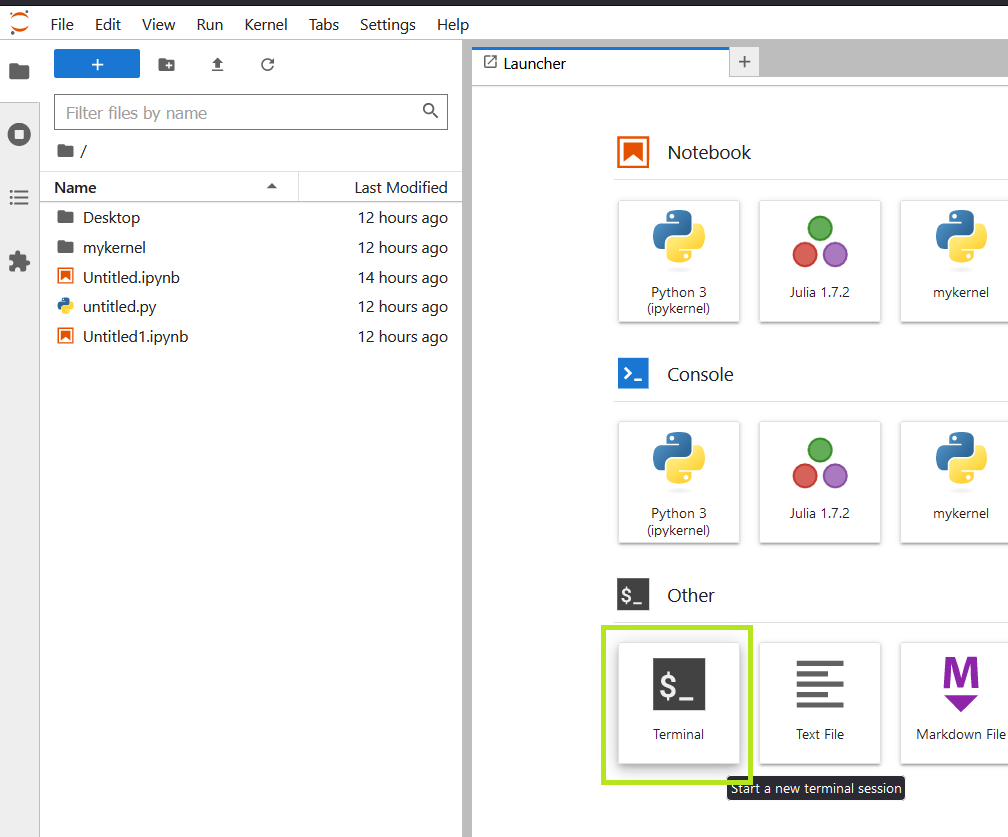
- Access the Terminal from the Launcher tab.
- Next, from the Terminal install the zip utility by running the following two commands:
$ sudo apt-get update $ sudo apt-get install zip - Once complete, you will create a zip archive of all files and directories in your home directory by running the following command:
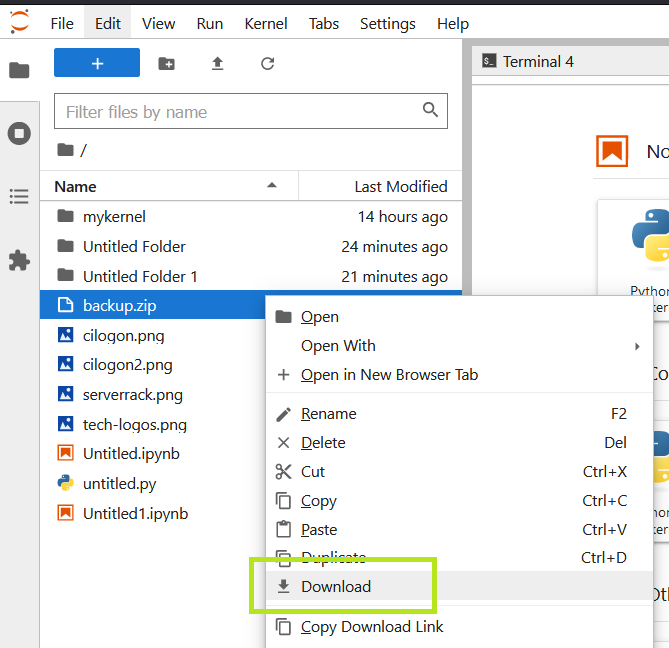
$ zip -r backup.zip * - Once complete, you will find a backup.zip file in the File Manager that can be downloaded.
Uploading and Unzipping a Zip Archive File
To upload the zip archive file to JupyterLab and extract its contents, you can do so using the file browser and the terminal.
- Click on the “Upload” button in the JupyterHub File Manager on the left-hand side of the screen
- Select the zip archive file you want to upload and click “Open” (This may take some time depending on the file size)
- In the terminal, navigate to the directory where you want to extract the files. You can use the cd command to change to the desired directory. For example:
$ cd /path/to/DesiredDirectory - Once you are in the desired directory, run the following command to extract the contents of the zip archive file to the current directory:
$ unzip /path/to/zip/backup.zip